In this tutorial i am going to walk you through from creating a sd card using Raspbian OS to accessing and 1st boot configuration. It is so easy that if you are reading this tutorial, in the end you are gonna say : “Thats it ?”
Enough of chit chat. Lets start. In this tutorial i am going to use raspberry pi model B 512 MB Ram & if you are reading this tutorial then most probably you have the same unit.
1. Hardware / Software required
- Raspberry pi.
- Ethernet cable.
- At lest 2GB sd card or a micro sd card with adapter.
- A working internet connection.
- A PC/ laptop with windows installed.
- Putty for windows : Download from here
- win32diskimager software : Download from Sourceforge
- Raspbian OS : Official download page (Go to Raw Images section -> Raspbian->downlaod image from http or torrent link which ever method you found suitable). At the time of writing this blog 2013-07-26-wheezy-raspbian.zip was available to download.
2. Prepare SD Card
I am using a 8GB class 4 SD card which i received with my raspberry pi unit (yes i got a good deal). The official minimum recommended size is 4GB sd card but i booted up raspberry successfully with a 2 GB micro SD card with a sd card adapter. In my opinion you should go with at least 8 GB class 4 (any higher size and higher class sd card will be better.) sd card.
- Insert your SD card in a card reader and connect reader to your computer or you can use an inbuilt one.
- Now unzip the 2013-07-26-wheezy-raspbian.zip file at a suitable location in your pc. If you check the unziped content you can see 2013-07-26-wheezy-raspbian.img file which is the image of Raspbian os.
- Now unzip win32diskimagerxxx.zip to a convenient location and open Win32DiskImager.exe.

- Now carefully choose your SD card in Win32DiskImager window. choosing wrong drive could cause potential data loss.

- click on the blue folder icon (check the image below) and browse to raspbian os image file which you extracted earlier in step 2. Then click on the write button to start writing the image file on the SD card. This process will take some time. Do not remove your SD card during write process.

- when write process successfully completed you will get a “Write Successfully” message. Now your Card is ready for first boot. Insert your SD card in raspberry pi box.
2. First boot and initial setup without using a keyboard and a monitor
- First connect Pi to router using an Ethernet cable then connect your pi with power supply. Wait for a minute so that pi can boot-up and get an ip from router. Now in your computer open a browser and in address bar write 192.168.1.1 and hit enter. enter username and password for your router to login into your router configuration page. Look for connected device in the configuration page. In list of connect devices, search for a device name RASPBERRYPI. Thats our cute little pi. Note down the IP address of the PI. I am using Netgear router wgr614v10. Different routers have different options. If you do not know how to search for attached devices in your router then you have to Google it or read the manual.
 As you can see from the above screenshot, raspberry pi has IP Address 192.168.1.4 on my network. This ip address might change if you disconnect and connect pi from the network. There are two solution for this problem either use DHCP reservation (which i am gonna use here) or assign a static ip address to your pi. DHCP reservation is a router dependent feature which might not be available to you. But we will deal with that later. For now let us concentrate on the task in hand.
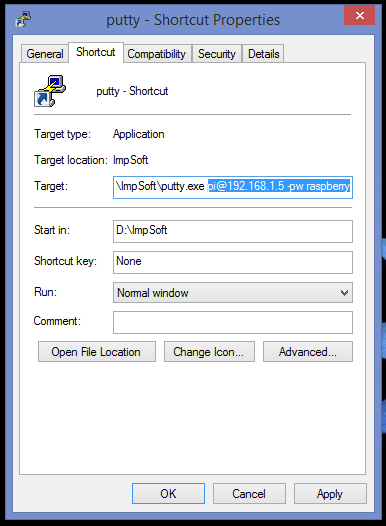
- Now open putty and enter the ip address of pi we got in step 1. set to connection type ssh and port to 22 if they are different by default and hit the open button.

- you will be prompted with a warning message. Just click yes. This is due to mismatched default key of putty. A new key will be generated after hitting the yes button. Now username and password is required to login via ssh. The default username is pi and password is raspberry. If you are not familier with unix or linux environment then i want to mention one point, while entering password it will not display anything on screen. Just type your password and hit enter.


- Now type in sudo raspi-config. This will display the following screen.
 You can navigate between option 1 to 9 using arrow key while you can highlight select or finish using tab key. Now if not highlighted, highlight the option 1 Expand File system and hit enter. Now you will be presented with following screen.
 just hit enter again. now once again you will at screen just before the screen displayed above. Now press Tab until it highlights Finish. Hit enter again and it will ask for reboot. select to reboot your raspberry pi. And that’s it.!!
Now you have your Pi successfully up and running. Its time to tinker with it. The very first problem in our hand is dynamic ip allocation of raspberry pi. so in my next post i will talk about DHCP reservation and how to assign static ip address. After that we will also install vnc server in the pi to access GUI from our computer and how to automatically start vnc server at boot.
My uses of raspberry pi till now
- My ISP requires me to login into a webpage before i can use internet. If i close the browser window then my internet disconnects. There is no problem if i am using a computer but if i want to use another devices like tablets, phones or anything that uses internet, i have to open my laptop just for keep me logged in. Now i use pi to keep me logged in 24X7. And i can use any device i want to without opening my laptop.
- I use Pi as a network attached storage.
- As a 24X7 on bittorrent box.
My futures plans with Raspberry pi
- As a dropbox clone with bittorrent sync.
- I want to create web-server but that have to wait untill i change my internet connection.